In this series we will build a web application that counts down the number of days to events. We will use Django to write the application and Python since Django is implemented using Python. The application and database will eventually be hosted on Microsoft Azure. More specifically, Azure Container Apps will host the application and Azure Database for PostgreSQL Flexible servers will be used to serve a database. And we will use several services from GitHub: Repositories for source control, Actions for CI/CD and Codespaces for a development environment.
GitHub Codespaces
We will use GitHub Codespaces for the development environment. GitHub Codespaces is Visual Studio Code running in the browser, backed by a Linux compute instance. This means that many applications can be developed on GitHub Codespaces and all you need is a web browser and a network connection! Mobile and desktop applications don’t work so well as GitHub Codespaces does not provide a virtual desktop. But web, command line, data science and other applications work just fine. Thus, a lot of what you will see in this series on GitHub Codespaces will transfer to Visual Studio Code on the desktop with little if any friction. The extensions you use on GitHub Codespaces will work on Visual Studio Code on the desktop. The keyboard shortcuts are also the same. If you are using WSL, macOS or a Linux like compute the command line will work the same. You can even connect remotely to a Codespace from Visual Studio Code. It’s like having the best of both worlds!
Now, because GitHub Codespaces uses compute in the Microsoft cloud, it’s not entirely free. However, you can use it for free, for up to 60 hours per month. That’s an average of 2 hours per day which is enough time to experiment with. All you need is a personal GitHub account which you likely already have and is free. You don’t even have to provide a credit card or payment info. I’ll be using a free GitHub account to write the demo application. In order to conserve your free quota, GitHub Codespaces time out after they have been idling. By default, the time out length is 30 minutes. You can set this anywhere from 5 minutes to 4 hours. I find 5 minutes to be rather limiting so I usually have mine set to 10 minutes. I’ll show you how set the time out but first we need to create a new Codespace.
Go to https://github.com/codespaces in a browser.
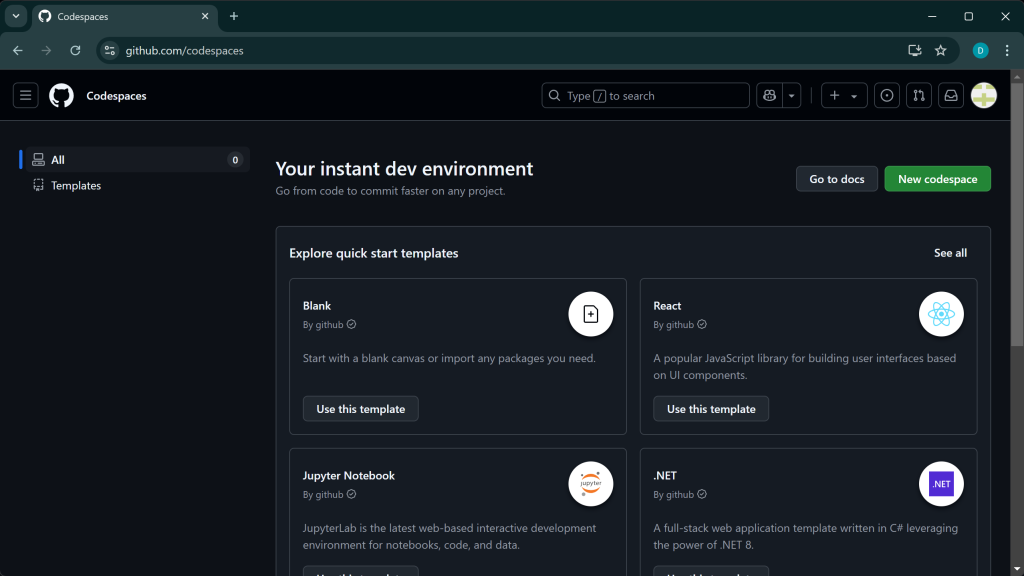
Here you can create a new Codespace from a template or manage existing Codespaces. For this application, we will start from scratch by clicking the Use this template button for the Blank template.
After a minute or less, you’ll see a brand new GitHub Codespace in a new tab.
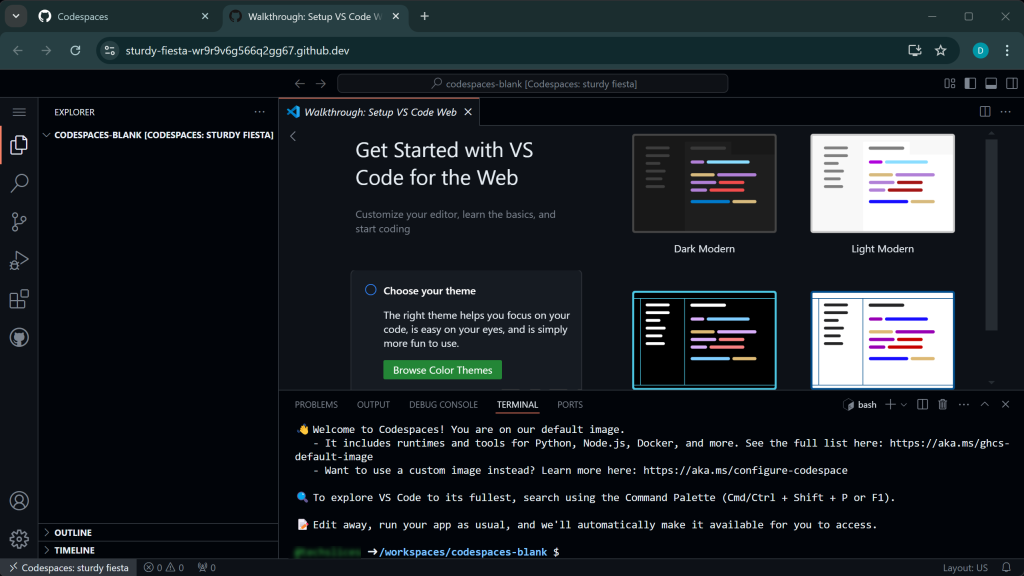
Again, if you’ve used Visual Studio Code on the desktop, this interface will not be a surprise.
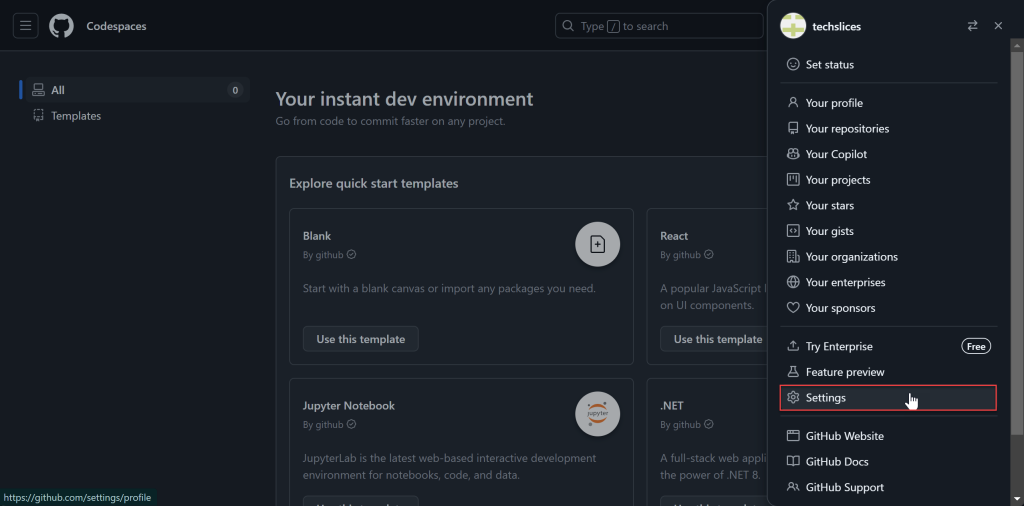
Before moving on, let’s see how to save your free hours by setting a time out interval. Go back to the tabs where you created the Codespace. In the upper right, click your profile picture to open the menu and then click Settings.
In the settings, under Code, planning and automation, click Codespaces.
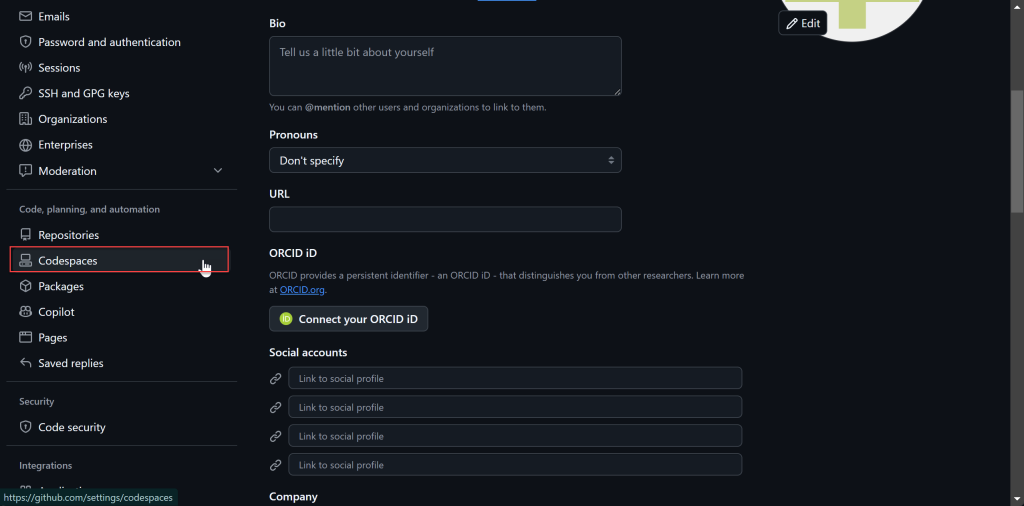
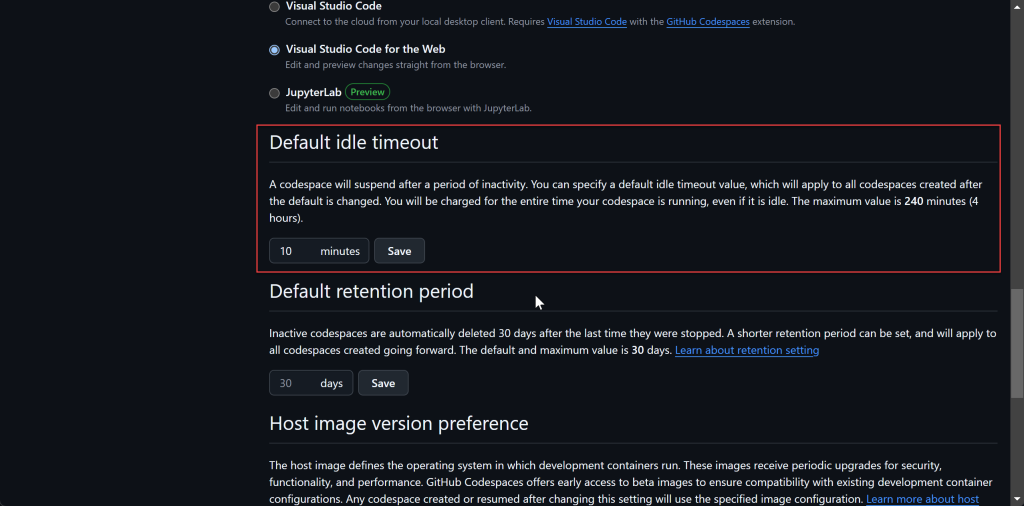
In the next screen, scroll down to Default idle timeout, change the value to between 5 and 240 minutes (4 hours) and click the Save button.
Return to the tab with the Codespace and continue the setup.
Configuring the Development Environment
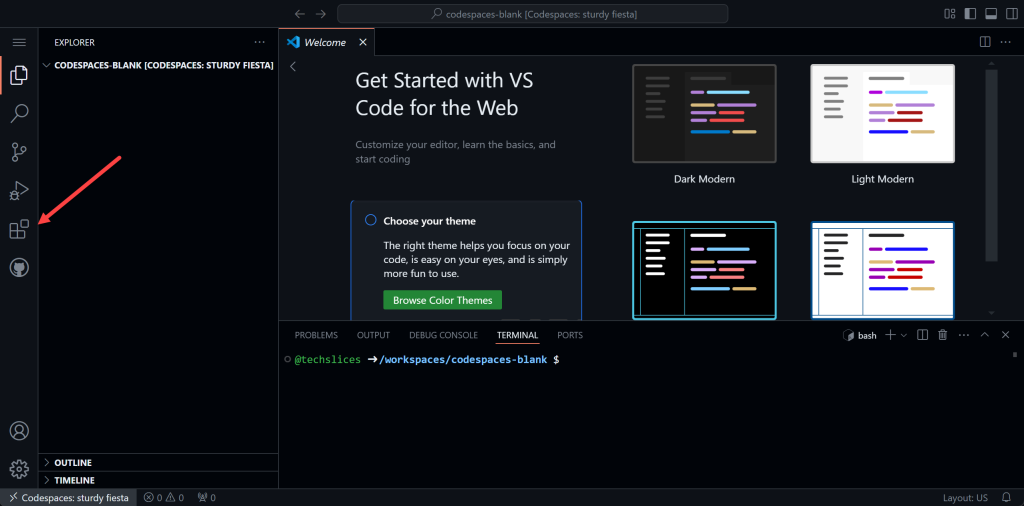
To get started, we need to install a few extensions. Click on the icon for the Extensions panel in the sidebar.
In the search box at the top of the Extensions panel, search for python.
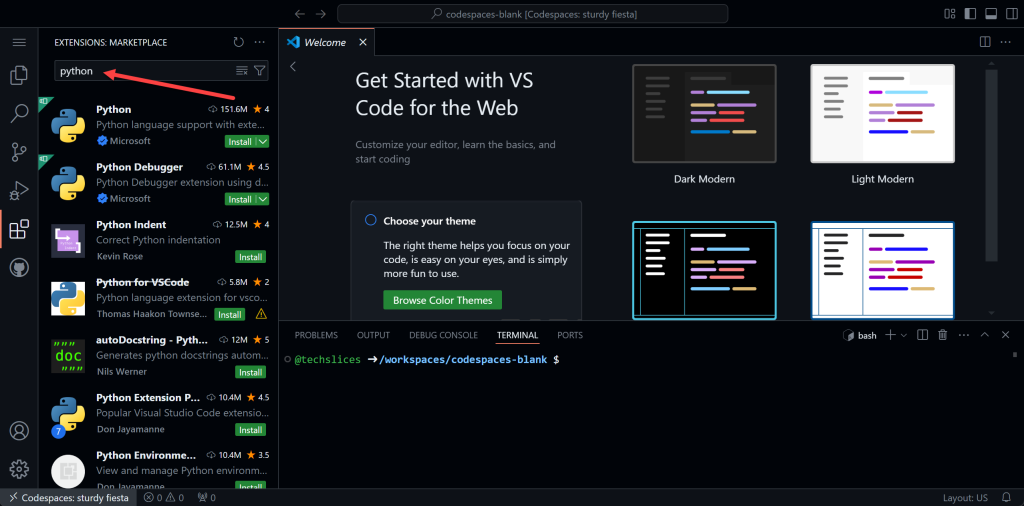
The first result, Python by Microsoft is what we want. This provides lots of features useful for developing Python applications including syntax highlighting, automatic indentation, code hints, debugging and virtual environment support. Click the green Install button to install the extension.
While the Python extension is installing, search for ruff in the Extensions panel. Install the extension from Astral Software. Ruff is a Python linter and formatter. And do the same for sqlite viewer and install the extension from Florian Klampfer.
We’ll install more extensions for other features as we progress through the series but for now these will be enough.
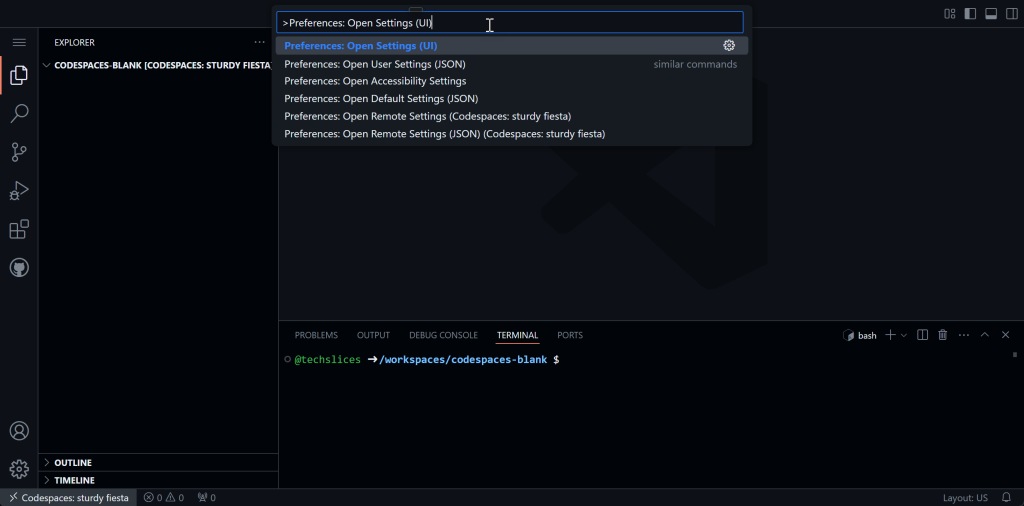
Now you’re going to configure some of the settings of Visual Studio Code. Press the F1 key to open the command palette. Search for and select Preferences: Open Settings (UI).
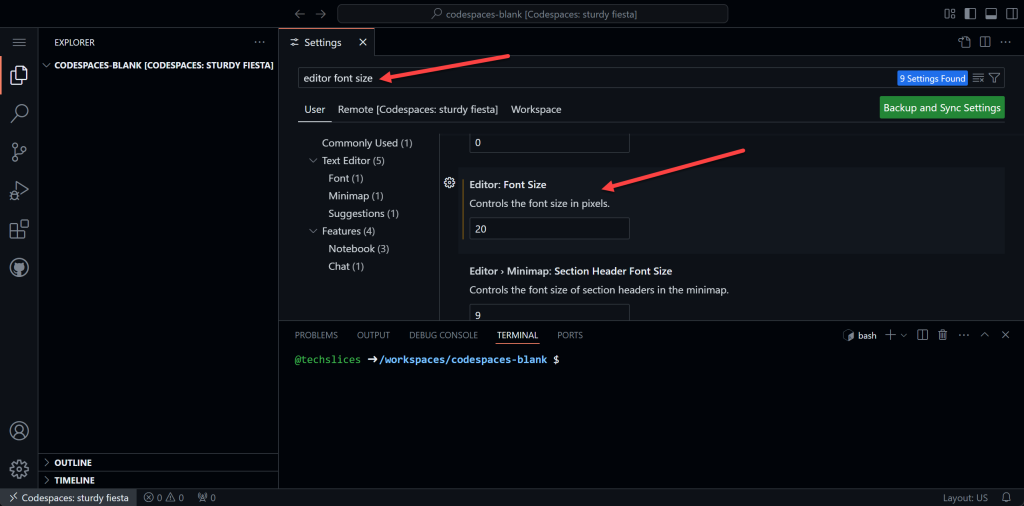
The default font sizes are a little small for my preferences, and for the screenshots so I’m going to make them a little bigger. In the Search settings field, search for editor font size and change the size from the default to 20. Do the same thing for terminal font size. Notice that a brown bar appears to the left of the changed settings.
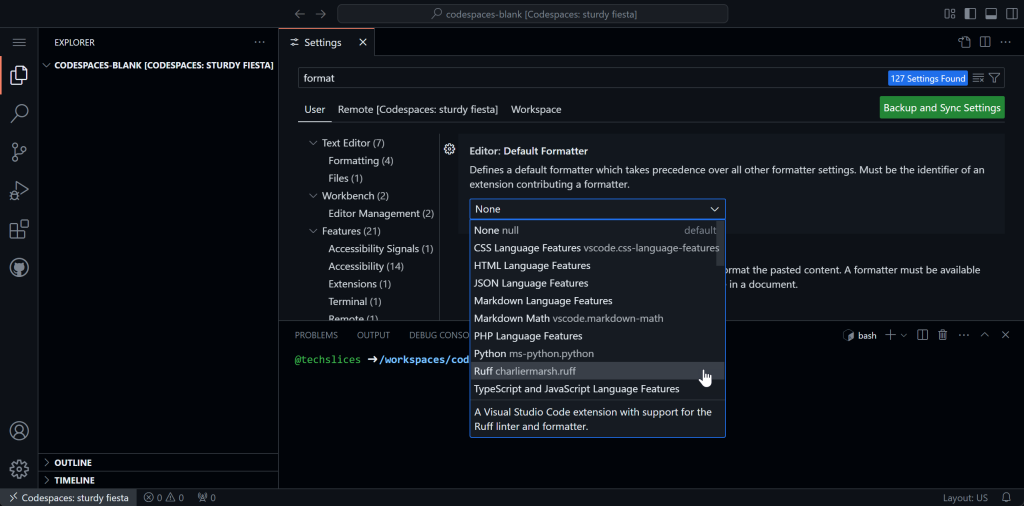
Search for format in the Settings. Click the dropdown in Editor: Default Formatter and select Ruff charliemarsh.ruff.
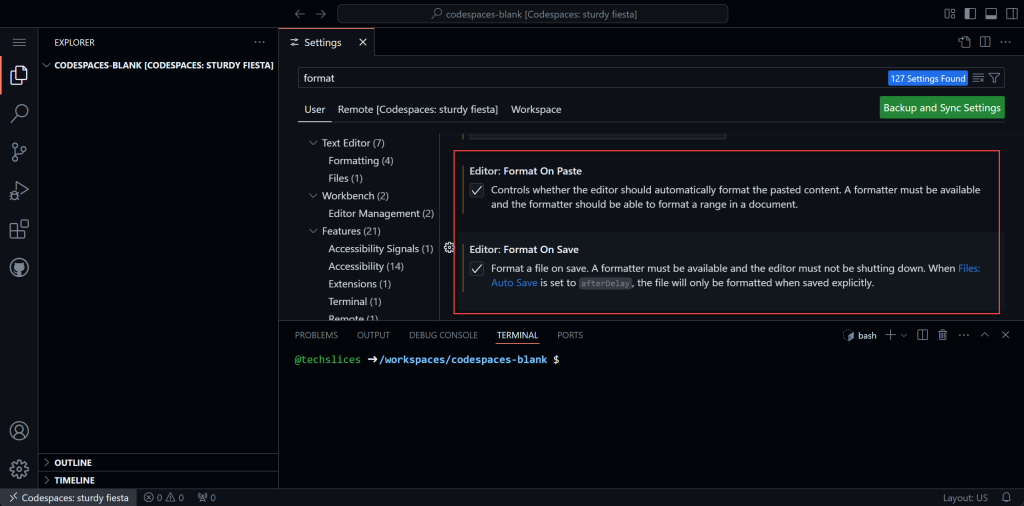
And check the boxes for Editor: Format On Paste and Editor: Format On Save to run Ruff when Python code is pasted or Python files are saved.
Starting the Django Project
At this point we could create a virtual environment. However, I don’t usually do this with working in a GitHub Codespace. A Codespace is generally tied to a single GitHub Repository and one repository is generally going to contain a single project or at least several projects with the same requirements. At least that’s have I’ve used them. So I won’t be making a virtual environment. On Visual Studio Code for the desktop, where you will have many projects with different dependencies, I would use a virtual environment for each one.
Django is distributed as a Python package. Therefore it can be installed with pip. To keeps things manageable, we’ll create a requirements.txt file and install the dependencies from there. Open a folder for the project and inside create a new file named requirements.txt. Place the names and optionally version numbers of the packages you wish to install.
DjangoThe requirements.txt file will be distributed as part of the project so that later on, we can install the dependencies again. To install the package from the requirements.txt file, use pip with the -r option passing it the name of the requirements file.
$ pip install -r requirements.txtThis will install Django and its dependencies. As part of the Django package, a utility named django-admin has been installed and is the starting point for a new Django project.
Throughout this series, you will be the phrase Django project and Django app. While you might think they mean the same thing, Django treats them differently. A Django project is a container for a web application build using Django. A Django app is actually a way of organizing your Django project into manageable and reusable features. For example, you could implement an e-commerce web application as a Django project. Then the project might include Django apps for a catalog, shopping cart, user management and so on.
Press Ctrl-` to open the integrated terminal panel. Run the django-admin utility, with the startproject command. The startproject command accepts two arguments. First is the name of the project, I’ll call mine countdown. Second is an optional folder. If this argument is omitted, the project will be placed in a new folder with the same name as the project. I find this to be unendingly redundant so I like to place the project in the folder the command is run from. So I will provide a dot for the location.
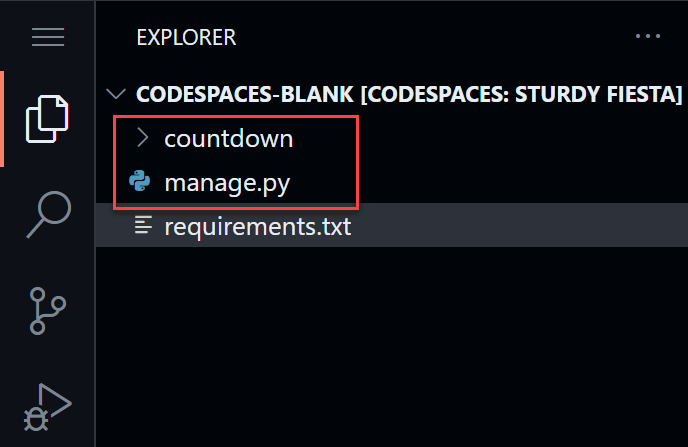
$ django-admin startproject countdown .You will notice that two items have been created. First is a folder with the same name as the project, countdown, but this is not the same as if a location was omitted. That would have put the two items you see in a new folder with the project name. Having those two folders with the same name to me can be confusing. The second is a file named manage.py. We will be making extensive use of this file as we develop the the countdown application in the series.
You now have a Django project that implements a web application that you can run using the development server. And you use the manage.py file, with the runserver command, to start the development server. Run the server from inside of the terminal panel.
$ python manage.py runserverYou’ll see some errors in red about unapplied migrations. You can ignore those for now. We’ll resolve the error when we start to work with databases in a future post. The development server will start and listen on the localhost address (127.0.0.1) and port 8000. And if you are running on Visual Studio Code on the desktop, you can open a browser and go to http://127.0.0.1:8000/ and see the default page for a new Django project. But what if you are running on a GitHub Codespace? The localhost address is referred to a server somewhere in the Microsoft cloud. So how do you view the Django project running on a Codespace? You may have noticed this popup in the lower right corner of the Codespace.

It tells us that the GitHub Codespace has forwarded port 8000 to a URL generated by the GitHub Codespace. Click the Open in Browser button, and the generated URL will open in a new tab.
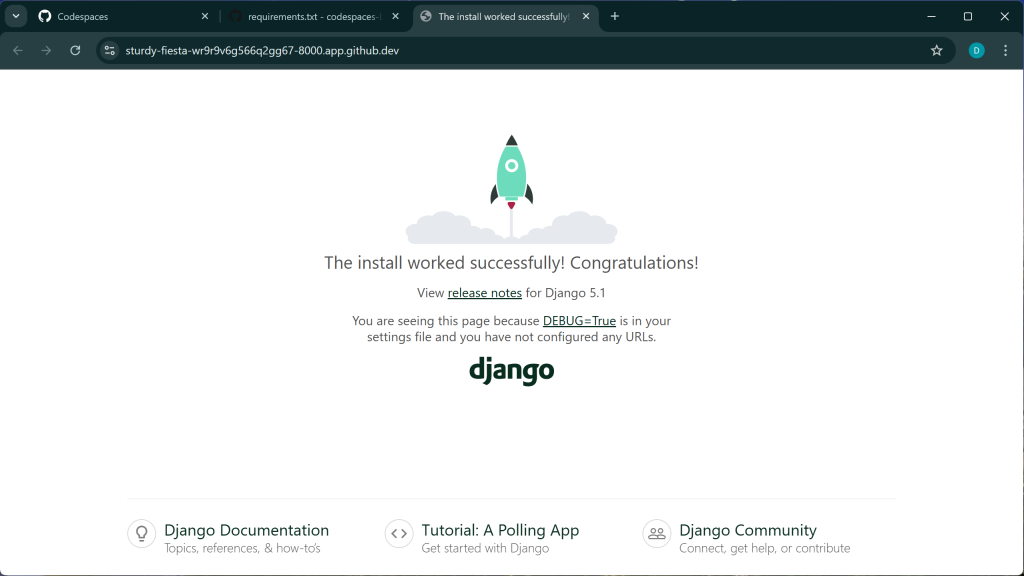
This URL is only for development and by default, it is only accessible by you (notice the Make Public button on the popup). However, it’s a great alternative to configuring it yourself. Regardless, you should see the default Django home page pictured above.
Summary
In this post you learned about GitHub Codespaces. You created a Codespace, configured it to save your free hours, and installed several extensions to help with Python application development. You also installed the Django package and created your first Django project. You saw how to run the Django development server and learned how port forwarding works in a GitHub Codespace so you can view the web application during development.
