Many times, an image will contain text. This text can come in many forms such as the name on the front of a store, or handwritten text. There are many use cases for identifying and transcribing text in an image. The Azure AI Vision Service makes it possible to do this, in one line of code.
The wonderful thing about using the Vision Service for optical character recognition (OCR) is that if you read the previous post on image analysis, you already know how to do most of OCR as well. Everything is the same except the visual features in the analyze or analyze_from_url methods. To perform OCR, simple add the READ to the list of features.
result = client.analyze(image_data, [VisualFeatures.READ])The result will contain a read attribute that will be None if no text was found. If text was found, it will be organized into blocks and the block will be organized into lines. Each line will have the text of the entire line, and the coordinates for the bounding_polygon surrounding the line. It will also do the same for each word in the line. And there is a confidence score for each word but not the line. Consider this image: (https://unsplash.com/photos/a-sign-that-says-call-me-if-you-get-lost-4TiH3m8yt6A)
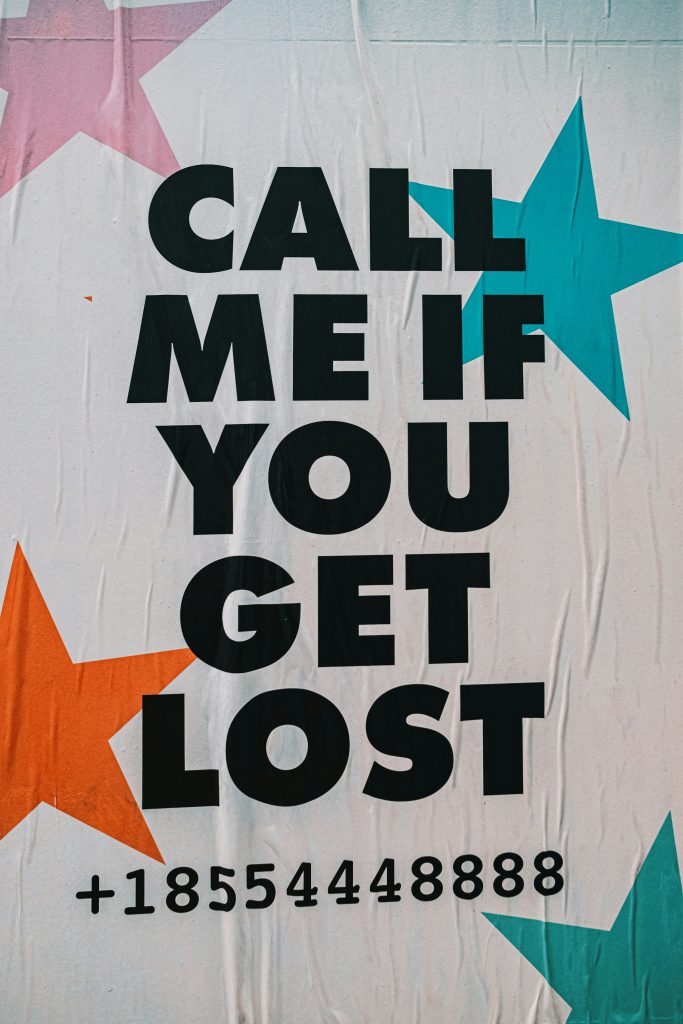
We can use this code to iterate over the blocks and lines:
for idx, block in enumerate(result.read.blocks):
  print(f"-- Block {idx + 1}")
  for ln_idx, line in enumerate(block.lines):
    print(f"   -- Line {ln_idx + 1}")
    print(f"      {line.text}")
And here is what we will see in the console:
-- Block 1
   -- Line 1
      CALL
   -- Line 2
      ME IF
   -- Line 3
      YOU
   -- Line 4
      GET
   -- Line 5
      LOST
   -- Line 6
      +18554448888
This is pretty straightforward. There are 6 lines of text. The second line has two words. Let’s try a more sophisticated image: (https://unsplash.com/photos/a-sign-advertising-safety-shoes-on-a-city-street-HlL8vMcp4cM)
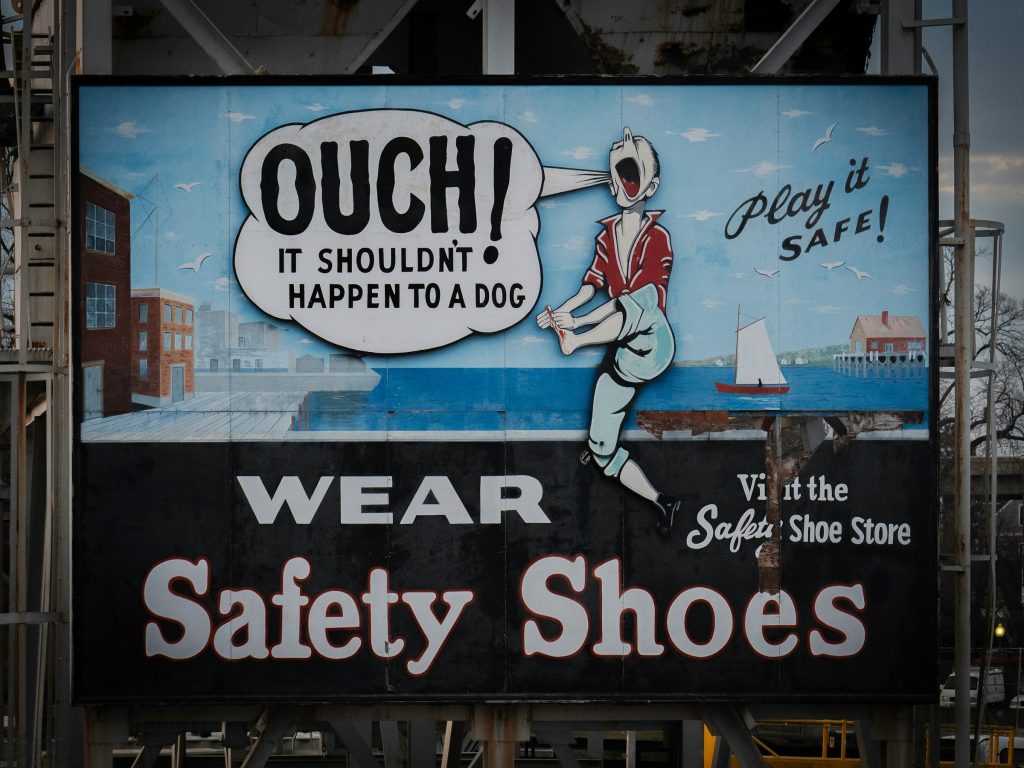
There is a lot going on here. Let’s see what the blocks and lines are.
-- Block 1
   -- Line 1
      OUCH!
   -- Line 2
      Play it
   -- Line 3
      IT SHOULDN'T
   -- Line 4
      SAFE!
   -- Line 5
      HAPPEN TO A DOG
   -- Line 6
      WEAR
   -- Line 7
      Vi it the
   -- Line 8
      Safety Shoe Store
   -- Line 9
      Safety Shoes
If you compare the results to the image, you’ll see that the lines are being detected left to right. Line 2 (“Play it”) is to the right of line 1 (“OUCH!”) even though line 2 is semantically related to line 4 (“SAFE!”). For this reason, it might be helpful to identify the lines by drawing their bounding polygons on the image. Recall that in addition to the text attribute, each line has a bounding_polygon attribute. The bounding_polygon is a list of four points (upper left and right, lower right and left) and each one has an x and y coordinate.
To visualize the bounding_polygon we can make use of the Python Imaging Library or PIL. Use pip to install the pillow package.
$ pip install pillowFrom the PIL package, bring in a couple of classes needed to draw on the image
from io import BytesIO

from PIL import Image, ImageDraw
Open the image file for reading to get the data. Then create a new Image. Notice that the image data must be of type BytesIO.
filename = "safety_shoes.jpg"

with open(filename, "rb") as image_file:
  image_data = image_file.read()
  image = Image.open(BytesIO(image_data))
Now get the points of the bounding_polygon for the first line in the result. Notice that the first point is duplicated and appended to the points. This is so that PIL will be able to close the polygon when it is drawn.
points = [(point.x, point.y) for point in result.readl.blocks[0].lines[0].bounding_polygon]
points.append(points[0])
To draw on the image, create an instance of ImageDraw from the image. Then call the line method. It takes the points of the bounding polygon, a color, and a line width.
image_draw = ImageDraw.Draw(image)
image_draw.line(points, fill="red", width=10)
Create a new filename for the output. Then save the image (not the image_draw) using the new filename.
from pathlib import Path

p = Path(filename)

image.save(f"{p.stem}_output{p.suffix}")
And this is the output.

Take a look at the second line (“Play it”).
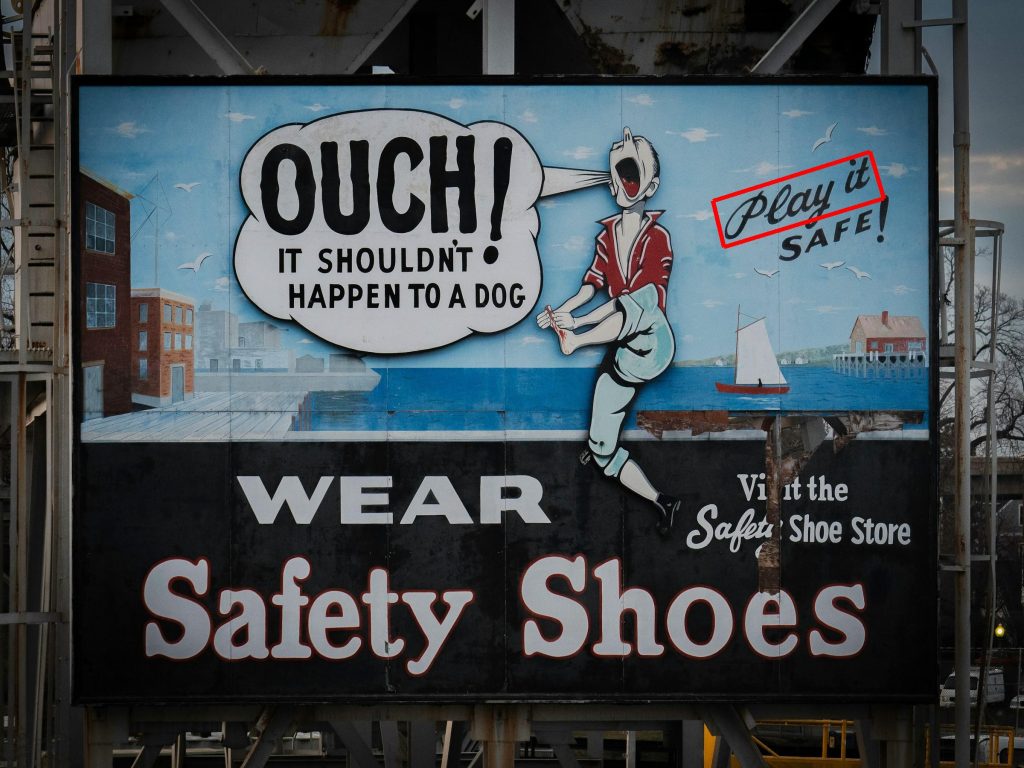
The bounding polygon is not always a square. This angled text is still recognized accurately by the Vision Service in this line.
Notice line 7 (“Vi it the”). This should be “Visit the”. However, damage to the billboard has removed the “s”. However, line 8 (“Safety Shoe Store”) is recognized despite the damage. Let’s take a look at the confidence scores for each word in the line.
for word in lines[7].words:
  print(f"{word.text} {word.confidence * 100:.1f}%")
The output shows that the score for “Safety” is much lower than the other words.
Safety 32.5%
Shoe 96.1%
Store 99.4%
This example also demonstrates how the Vision Service is able to recognize text is multiple styles within the same image.
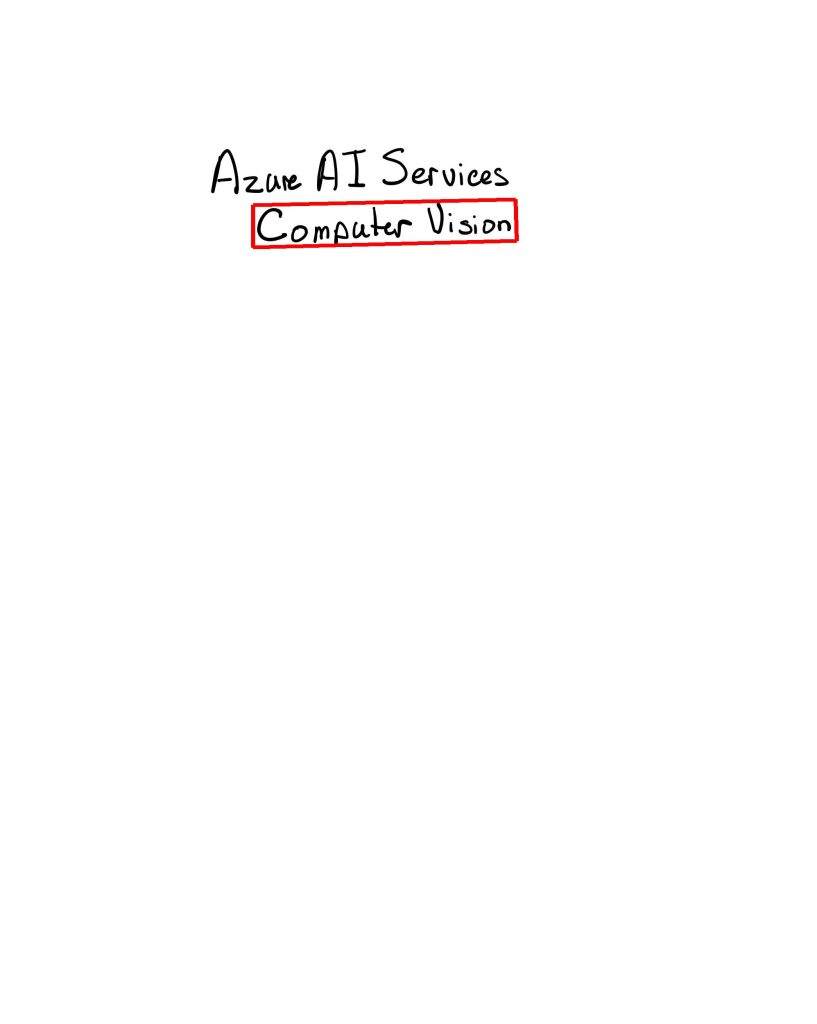
The Vision Service can also recognize handwritten text. Take a look at this example:
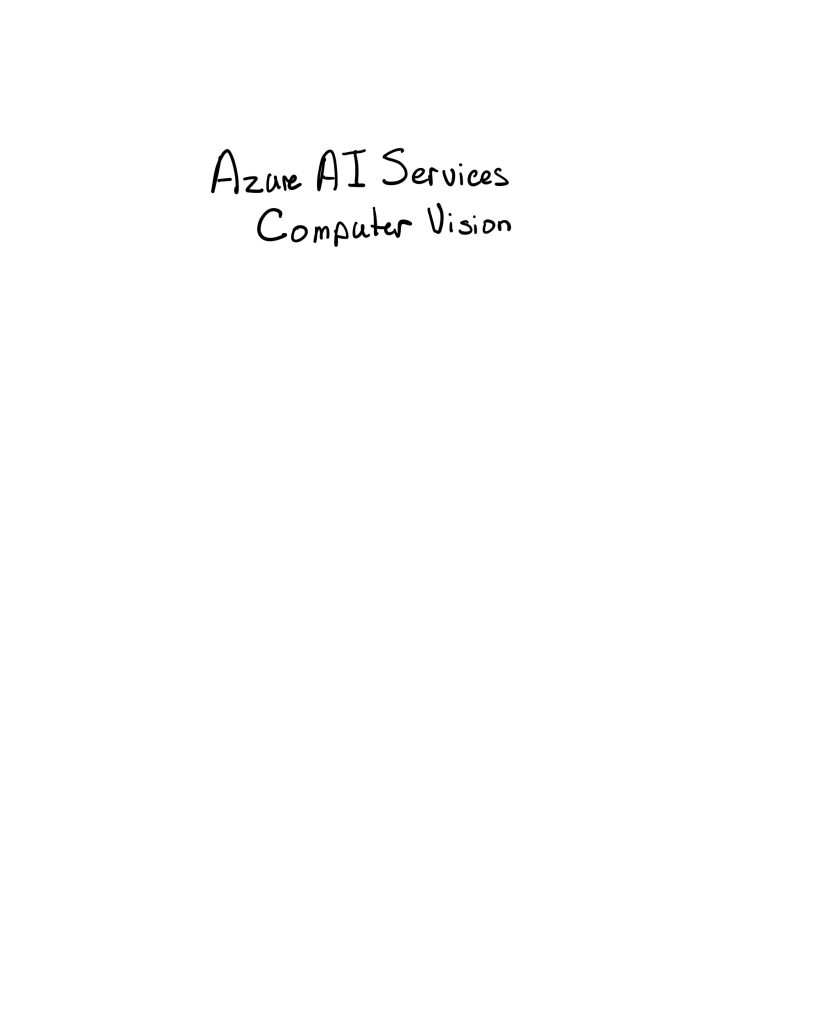
The block and lines that the Vision Service recognized are:
-- Block 1
   -- Line 1
      Azure AI Services
   -- Line 2
      Computer Vision
And it correctly detects the bounds of the lines. Here is line 2:
The Vision Service also recognizes text in more language than English. It can recognize handwritten text in 9 languages and printed text in over 150 languages. Here is an example of printed text in French: (https://www.pexels.com/photo/store-front-entrance-in-old-building-in-france-20407572/)
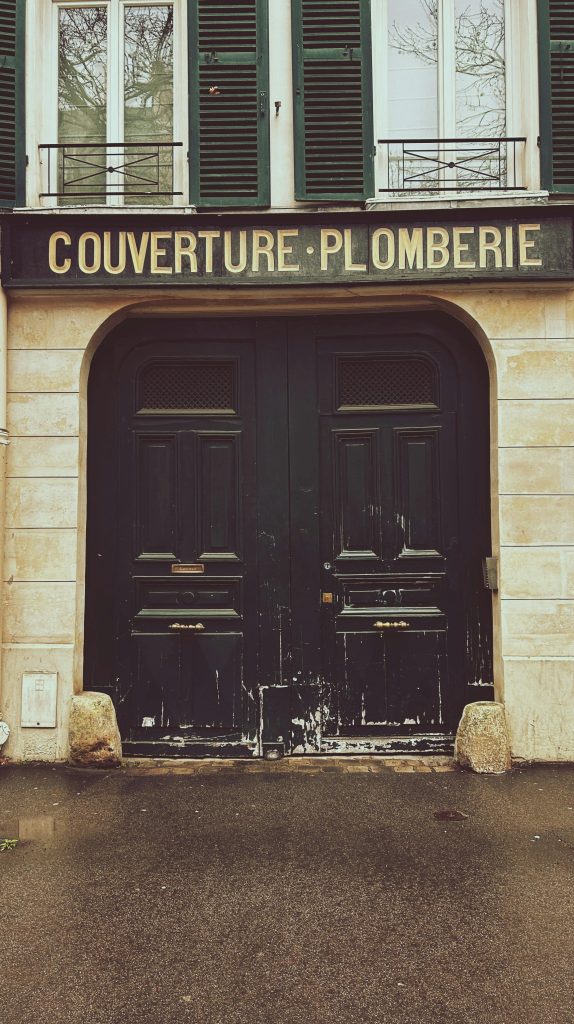
The Vision Service correctly recognizes the text “COUVERTURE PLOMBERIE” which translates to “PLUMBING COVERAGE” in English.
And just like the Image Analysis service, you can experiment with the features of OCR in Azure Vision Studio.
After logging in to Azure Vision Studio, on the Optical character recognition tab, click on the card for Extract text from images.
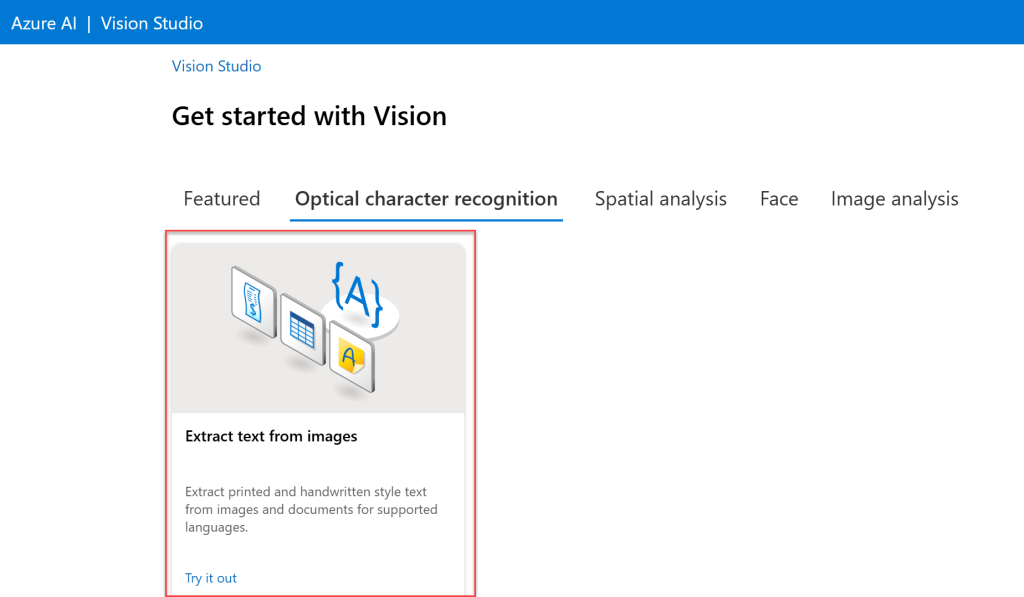
On the next page, you can select one of the sample images, or upload you own.
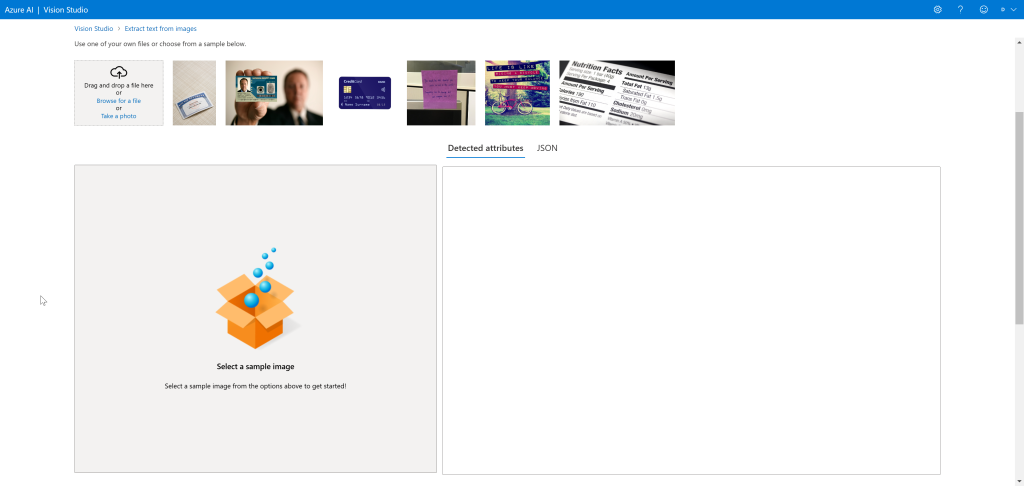
I’ll upload the Safety Shoes image from before.
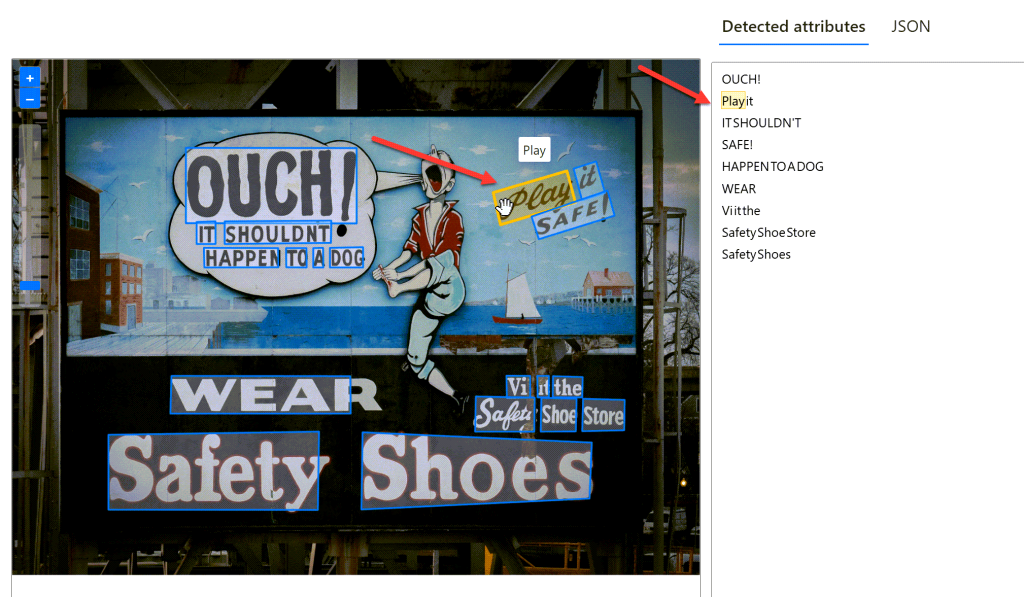
As you can see, Azure Vision Studio recognized the same text that was recognized using the SDK. Also, the bounding polygon of each word has been drawn on top of the image. Hovering over a word in the results will highlight the bounding polygon in the image.
Summary
In this post, you saw how to use the Azure AI Vision Service to recognize text in images. This is simple coming from the previous post about image analysis as the only difference is the visual feature detected in the image. You saw that Azure AI can recognize both printed and handwritten text in multiple languages. You used the pillow package to highlight the areas in the image identified as text. And you saw how to detect text in images using Azure Vision Studio in the browser.
