Computers can represent information in many different medium. In the previous two posts (here and here) on Azure AI Services we’ve looked at analyzing text using the Language service. In this post, we’ll see how to analyze images with the Vision service.
Take a look at this picture.
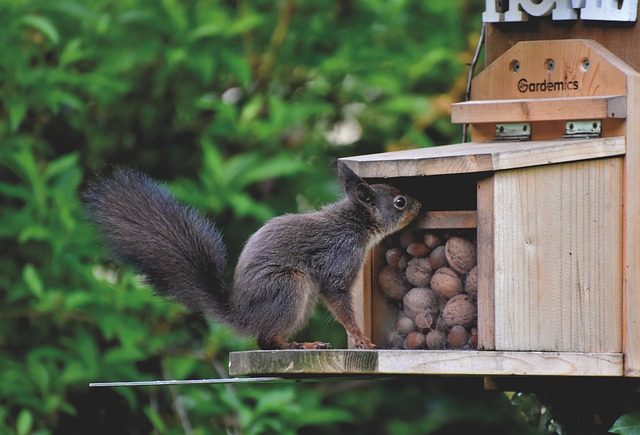
This is a picture of a squirrel. But how can you get a computer to recognize it? It’s a simple idea with a complex solution. And this is where having access to an AI model trained at Microsoft scale comes in handy. Let’s see how to take advantage of object detection.
To start, provision an instance of Azure AI Services multi-services account. You could provision an instance of the Vision service as well. In some cases, it might be simpler to use a single Azure AI Services instance for all of the difference services (Language, Vision) you need to use. Again it depends on the needs of your application and team.
In the Azure Portal, in the page for the Azure AI Services instance, under Resource Management, find Keys & Endpoint. Copy one of the keys and the endpoint for use in the .env file in the sample as seen in the previous posts on the Azure Language service.
The Vision Service image analysis capability support several different features. These range from object detection to tagging and captioning, all of which we will see in this post.
Install the package for the Azure Vision service image analysis Python SDK with pip.
$ pip install azure-ai-vision-imageanalysisIn a new Python file, main.py, import the ImageAnalysisClient. Also import the VisualFeatures which will be used to tell the Vision service which features we want to detect.
from azure.ai.vision.imageanalysis import ImageAnalysisClient
from azure.ai.vision.imageanalysis.models import VisualFeatures
To authenticate, you’ll still need AzureKeyCredential and to load the key and endpoint from the .env file, the load_dotenv function and the os module.
import os

from azure.core.credentials import AzureKeyCredential
from dotenv import load_dotenv
Load the .env file and get the environment variables.
load_dotenv()

VISION_ENDPOINT = os.getenv("VISION_ENDPOINT")
VISION_KEY = os.getenv("VISION_KEY")
Use the endpoint and key to create an AzureKeyCredential and ImageAnalysisClient.
credential = AzureKeyCredential(VISION_KEY)
client = ImageAnalysisClient(VISION_ENDPOINT, credential)
To get an image, you can call one of two methods. The analyze_from_url method accepts a URL to an image stored online such as Azure Blob Storage or a GitHub repository.
result = client.analyze_from_url(image_url, visual_features)You can also load a local image file with the analyze method.
with open("image.jpg", "rb") as image_file:
  image_data = image_file.read()

result = client.analyze(image_data, visual_features)
Regardless of the method used, you also supply a list of VisualFeatures attributes. These are the features you wish to detect. For example, the OBJECTS attribute will return names and confidence scores for any objects detected. It will also return the coordinates and size for each bounding box surrounding the objects.
import json

result= client.analyze(image_data, [VisualFeatures.OBJECTS])
print(json.dumps(client.objects.as_dict(), indent=2))
In the result, there will be an objects attribute. Here is what was detected in the squirrel image.
{
  "values": [
    {
      "boundingBox": {
        "x": 82,
        "y": 163,
        "w": 342,
        "h": 192
      },
      "tags": [
        {
          "name": "eastern fox squirrel",
          "confidence": 0.708
        }
      ]
    }
  ]
}
The model is just under 71% that the image contains an eastern fox squirrel in a box 342 x 192 pixels.
There are also other visual features such as captions and tags. The tags include a name and a confidence score.
result = client.analyze(
  image_data,
  [VisualFeatures.TAGS, VisualFeatures.CAPTION]
)

print("Tags")
for tag in result.tags["values"]:
    print(f"\t{tag['name']} ({tag['confidence'] * 100:.2f}%)")
print("Caption")
print(f"\t{result.caption.text} ({result.caption.confidence * 100:.2f}%)")
Here is an excerpt of the tags and the caption.
Tags
	outdoor (99.56%)
	squirrel (98.03%)
	animal (96.11%)
	mammal (93.76%)
	tree (93.68%)
	rodent (91.87%)
	birdhouse (86.75%)
	douglas' squirrel (85.11%)
	grey squirrel (84.42%)
	wooden (77.36%)
	wood (66.15%)
	wildlife (58.45%)
Caption
	a squirrel looking at nuts in a bird house (78.10%)
Using Azure Vision Studio
In the previous post on the Language service, you saw Azure Language Studio. The Vision service has Azure Language Studio. And it lets you use the different features of the Vision service without have to write against the SDK, or call the REST API. The URL for Azure Vision Studio is https://portal.vision.cognitive.azure.com/.
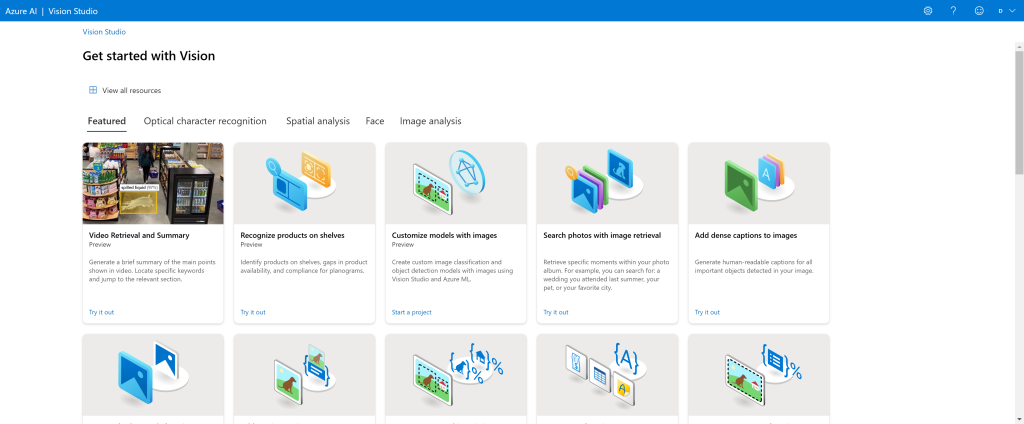
Click the View all resources link to select a resource to use. Again, using Vision Studio will consume resources and you may be charged for it. Now you can select one of the features on the Vision service. On the Image Analysis tab, select Detect common objects in images.
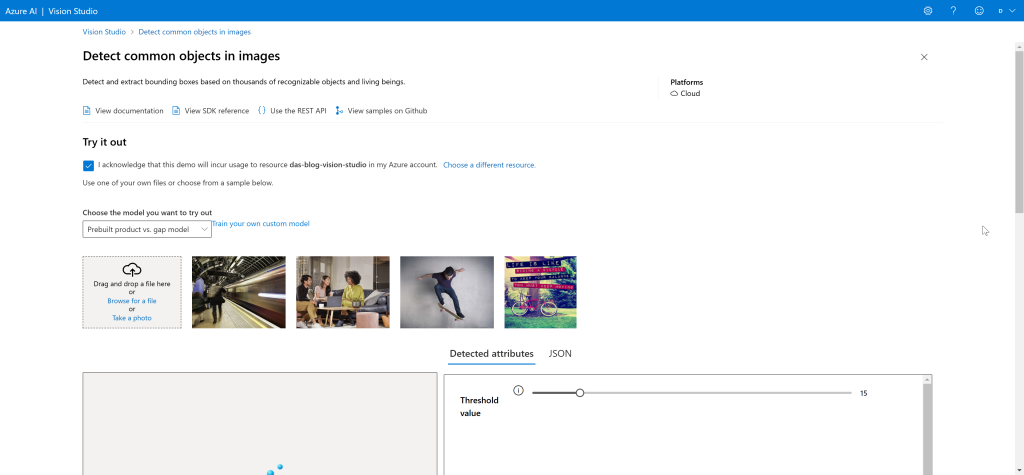
Check the box to acknowledge that you may be billed for using Vision Studio. And select if you want to use the pre-trained model or a custom trained model. I’ll be using the pre-trained model. Then you can select an image to analyze. Vision Studio includes several samples to choose from. I’ll upload the squirrely picture.
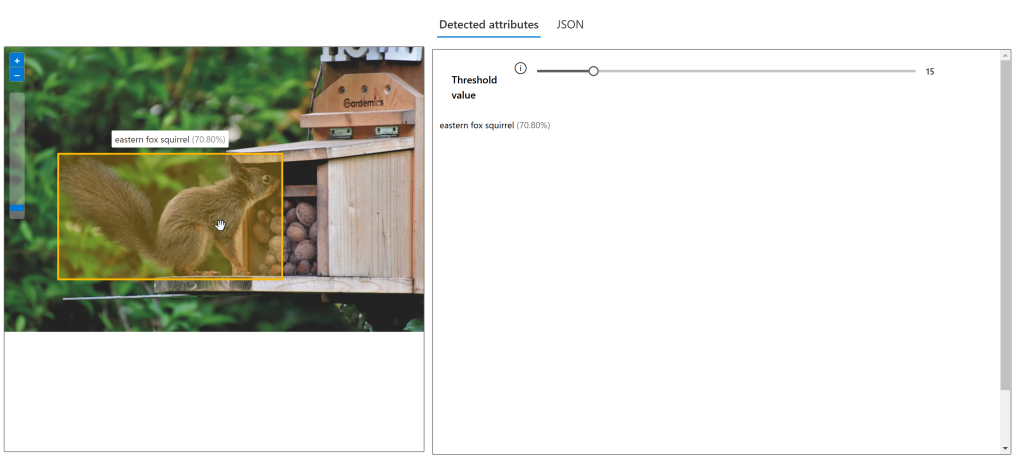
In the Detected attributes tab, the results are the same as when using the SDK. The model is just under 71% sure that this image contains an eastern fox squirrel. It also draws the bounding box over the image. If you hover over the bounding box, it will be highlighted and show the name and confidence score.
Summary
In this post you learned about image analysis using the Azure AI Vision Service. You saw how provision an Azure AI Services multi-services account. With a multi-services account, you can access multiple Azure AI services from the same resource. The demo showed how to use get image data from URLs online and local image files. In addition, the post covered how to use object detection, captioning and tagging of images. And you saw how to use image analysis from Azure Vision Studio in the browser.
