
It’s amazing how much of the world’s data, especially the business world’s data, is still contained in documents, forms, and other physical paper media. Until recently, extracting data from physical documents was a manually, time-consuming and error-prone process. Microsoft Azure AI Document Intelligence lets you leverage the power of artificial intelligence to automate the process of extracting data from physical documents. In this post we will look at what it takes to get started.
What is Azure AI Document Intelligence
Azure AI Document Intelligence is part of the Azure AI Services. The Azure AI Services allow almost any developer to add AI features to their applications while knowing little if anything about the inner workings of artificial intelligence. A lot of the time, the “hard work” of using an AI model to make predictions is reduced to a single line of code. The rest of the code related to AI services is boilerplate configuration and analyzing the results which is what makes your application unique.
Azure AI Document Intelligence offers solutions to the problem of extracting information from documents. For example, Azure AI Document Intelligence can extract printed and handwritten text from documents and forms. But AI Document Intelligence goes far beyond optical character recognition (OCR). AI Document Intelligence can recognize structures in a document such as headings, tables and paragraphs. It can also extract data from forms and tell which checkboxes are selected.
For common types of documents, Azure AI Document Intelligence offers a number of prebuilt models. There are prebuilt models for invoices, contracts, business cards, and US taxes forms among others. And there are also a generic layout model that will extract text, tables, figures and selected checkboxes. It can even recognize page numbers and table and figure captions. And if you have other needs, you can train custom models as well.
Getting Started with Azure AI Document Intelligence
To use Azure AI Document Intelligence you must have an Azure account. If you do not have one you can sign up for a free Azure account at https://azure.microsoft.com. New customers will receive a $200 credit for the first 30 days. Then you can get 12 months of popular services – including Azure AI Document Intelligence – for free!
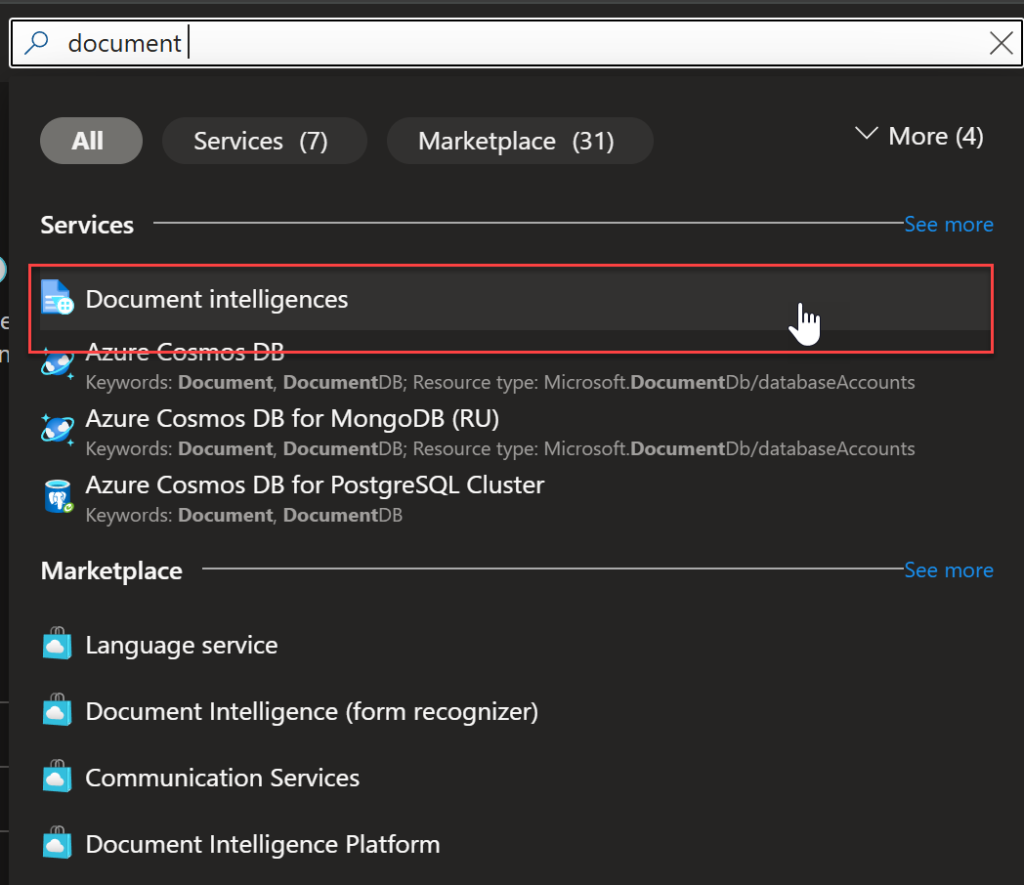
With your Azure account, log in to the Azure Portal at https://portal.azure.com. You’ll need to provision an instance of AI Document Intelligence. At the top of the portal, in the search box, look for Document Intelligence.
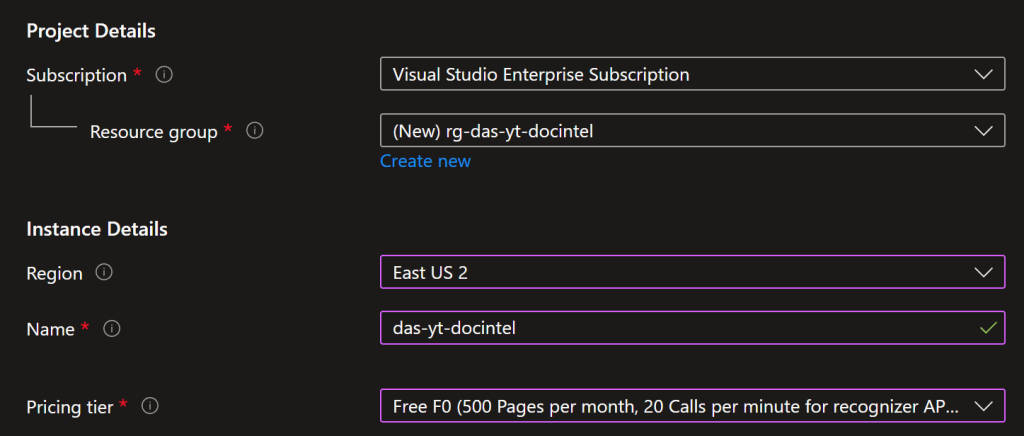
On the next page, click the Create button. You will be taken to a form to configure a new AI Document Intelligence instance. Select or create a resource group and select a region. Give the instance a unique name and select a pricing tier. Again, you can get the free F0 tier of AI Document Intelligence for 12 months.
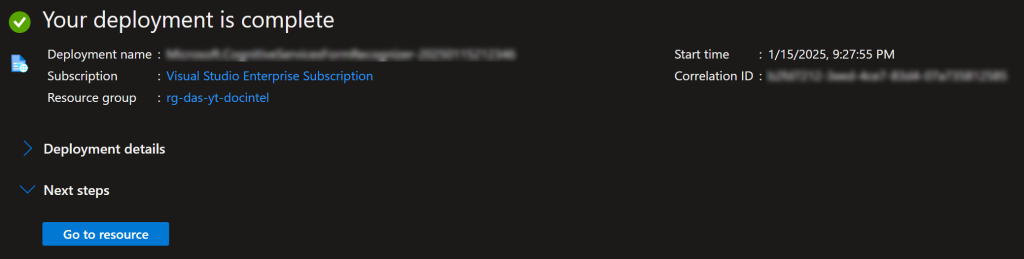
Click the Review + create button at the bottom of the page to validate the configuration. Once validation has succeeded, click the Create button to provision the new instance. There are other ways to provision Azure AI Document Intelligence such as multi-service instances and containers. Those beyond the scope of this post. Click the Go to resource button when provisioning is complete.
Azure Document Intelligence Studio
The easiest way to see how Azure AI Document Intelligence works, is to explore the features using Azure Document Intelligence Studio. From the resource overview, under the Get Started tab, click the Go to Document Intelligence Studio button.

Azure Document Intelligence Studio lets you explore the features of Azure AI Document Intelligence without writing any code or installing any software. You can explore the major features through a web-based portal. Note that using the Azure Document Intelligence Studio will consume your free quota or you will be billed for the time consumed.
Looking at the features you can see the Document Analysis section which has more generic models for extracting printed and handwritten text, structures such as tables and check boxes. Then there are a number of prebuilt models. We will be looking at this section in just a minute. And finally there are custom models for extracting data and also a custom model for classification.
For this post, let’s take a look at a couple of the prebuilt models. Click on the Try it out link for Invoices.
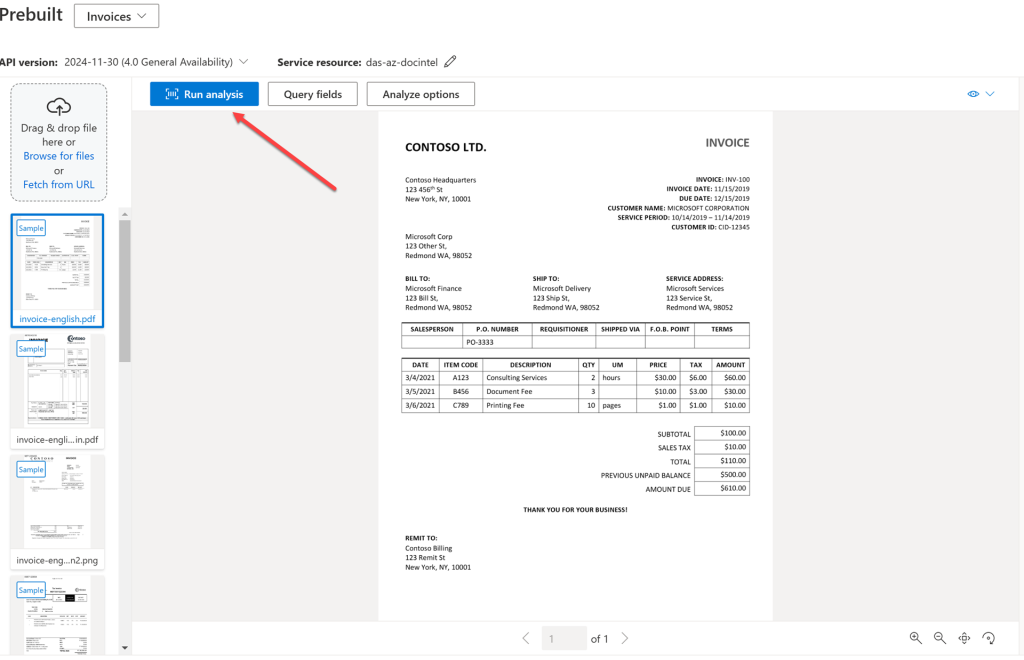
You will see a few sample images containing images. Select the first one and click the Run analysis button.
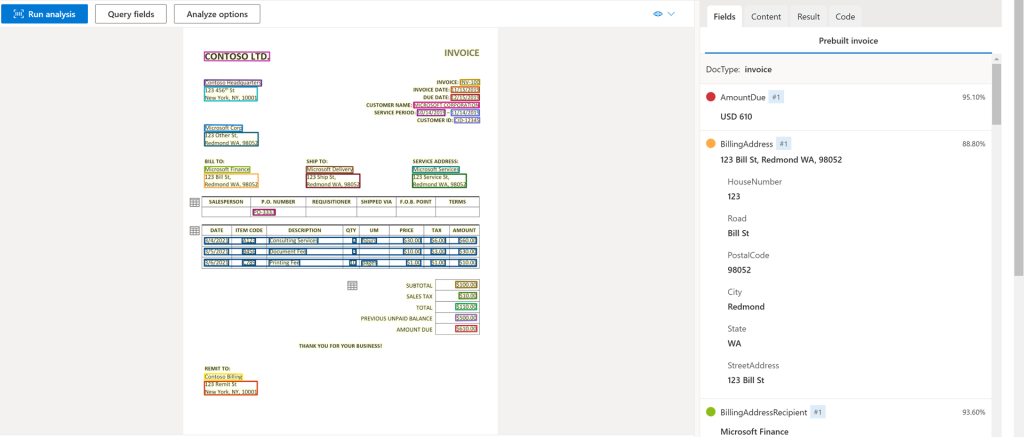
Using AI Document Intelligence, the Document Intelligence Studio has extracted different entities that are commonly found on invoices such as contact information, items billed, payment information along with a summary of charges.. Document Intelligence Studio has overlaid the boundaries of those entities onto the image of the card. In the list to the right, are the values of the entities and a confidence score. So AI Document Intelligence is 95.1% sure that this invoice contains an amount due of 610.
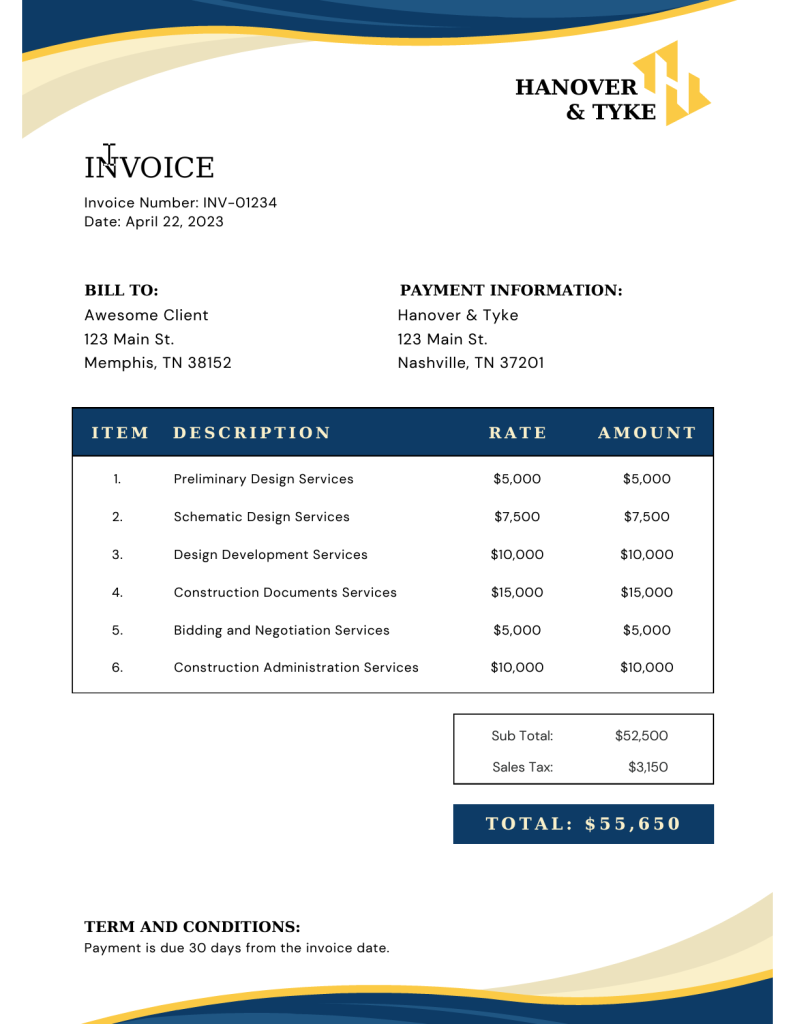
Of course, the provided samples are always going to work great. So let’s try an invoice that the model hasn’t seen before. Here is an invoice fictional purchase and company.
In Document Intelligence Studio, drag the image on the space in the left sidebar. Click the Run analysis button again.
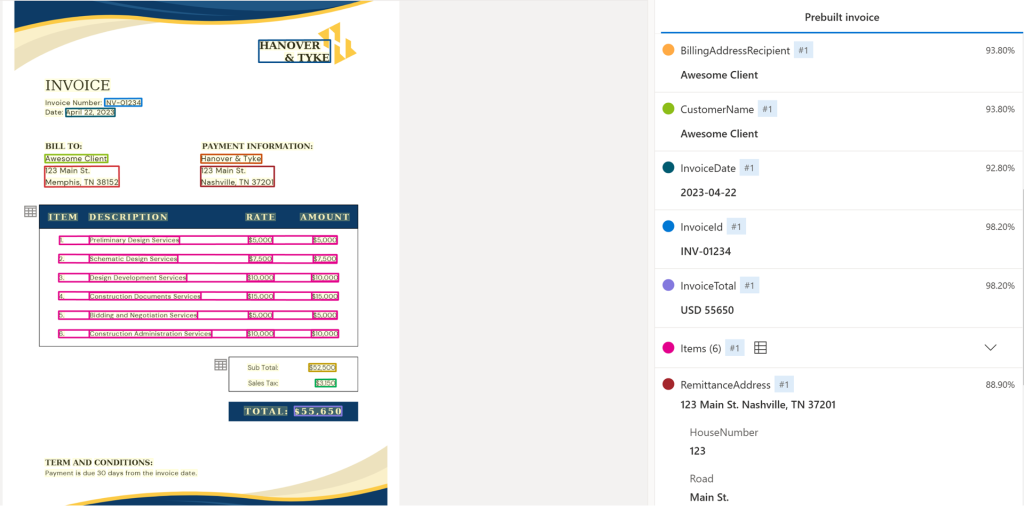
Azure AI Document Intelligence has correctly identified the important entities on the invoice. It recognized the address, company name, billed items and amounts most of them with 90% or higher confidence scores.
Using an SDK
The Azure Document Intelligence Studio is great for experimenting with the features of AI Document Intelligence. But to integrate AI Document Intelligence into your application, you’ll need to access it with code. Like all the Azure AI Services, AI Document Intelligence is exposed as a REST API. But for common languages like C#, JavaScript, and Python (the language I will use) there are SDKs. Again, in a lot of scenarios, this reduces the “hard work” of making predictions to a single line of code and you can work with language native structures when analyzing the results instead of parsing JSON data.
The SDK is distributed as a Python package and can be installed with pip.
$ pip install azure-ai-documentintelligence==1.0.0b4For this demo, the image or PDF of the invoice needs to be accessible at a URL. This could be in Azure Blob Storage or I’ll be using a raw link in a public GitHub repo to keep it simple. And if you want to secure your documents, you can always use the Azure security features to restrict access to AI Document Intelligence.
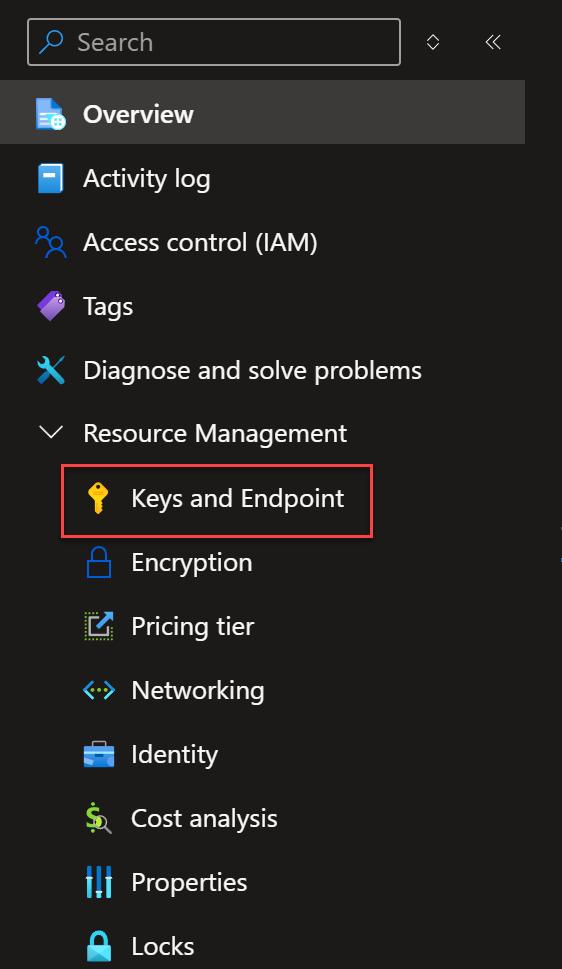
Next, you’ll need to go back to the Azure Portal and the overview of the AI Document Intelligence resource you created earlier. On the left side, expand Resource Management and click Keys and Endpoints.
Copy one of the keys and the endpoint for use in your code. Remember to keep the key a secret. It will be used to authenticate access to the AI Document Intelligence resource.

You might notice that the endpoint has a domain of cognitiveservices.azure.com. Originally, the Azure AI Services were called the Azure Cognitive Services. They were rebranded in 2023. You still might see the term Cognitive Services uses in some documentation and code.
In a new Python file import the modules needed for Azure AI Document Intelligence and three constants for the key and endpoint and the URL of the PDF.
from azure.core.credentials import AzureKeyCredential
from azure.ai.documentintelligence import DocumentIntelligenceClient
from azure.ai.documentintelligence.models import AnalyzeDocumentRequest

DOCINTEL_ENDPOINT = "{YOUR_VALUE_HERE}"
DOCINTEL_KEY = "{YOUR_VALUE_HERE}"
DOCUMENT_URL = "{YOUR_VALUE_HERE}"
Create an AzureKeyCredential using the DOCINTEL_KEY and use the credential and DOCINTEL_ENDPOINT to create a DocumentIntelligenceClient.
credential = AzureKeyCredential(DOCINTEL_KEY)
client = DocumentIntelligenceClient(endpoint=DOCINTEL_ENDPOINT, credential=credential)
Call the begin_analyze_document method on the client. It expects the name of the model which is prebuilt-invoice for this demo. The second value is an instance of AnalyzeDocumentRequest which uses the DOCUMENT_URL. The method will return an AnalyzeDocumentLROPoller. Analyzing documents could take a while so the poller will wait until the analysis has completed after the result method will return the analysis of the document.
poller = client.begin_analyze_document(
    "prebuilt-invoice", AnalyzeDocumentRequest(url_source=DOCUMENT_URL)
)
result = poller.result()
Now the result contains the data extracted from the invoice. These will be in the fields for each document in the result.
result.documents[0].fieldsFor example to get the billed items you could iterate over the Items key:
for item in result.documents[0].fields["Items"].value_array:
    print(item.value_object["Amount"].value_currency.amount)
The values returned are the six values in the invoice.
5000.0
7500.0
10000.0
15000.0
5000.0
10000.0
You can see a complete list of the entities in the prebuilt invoice document schema on GitHub at https://github.com/Azure-Samples/document-intelligence-code-samples/blob/main/schema/2024-07-31-preview/invoice.md.
Of course there is much more that you can do with the invoice model, as well as Azure AI Document Intelligence. Those are good topics for future posts.
Summary
In this post you learned about Azure AI Document Intelligence for automating the processing of documents and forms. You saw how to provision a new instance of Azure Document Intelligence. You also saw how to use Azure Document Intelligence Studio to experiment with AI Document Intelligence without writing any code. And you saw how to use the Python SDK to to analyze documents using the prebuilt invoice model and parse the results.