The AI revolution has reached the point where most applications that don’t leverage AI in some way, will be outliers. This presents a challenge to applications developers. Why? Because AI is hard, like really hard. First is the task of training an appropriate model. This requires specialized knowledge in mathematics and specialized hardware in the form of GPUs. And that is an overgeneralization. Then you have to be able operationalize the model to make it accessible to your application. And we haven’t even started to discuss security, monitoring or the other supporting services. Then you have to build the application sometime!
TLDR: There is a lot to be done and if AI is not your core competency, it’s not worth it to do everything yourself. And even if you could, the costs would likely outweigh the benefits.
That’s where the Microsoft Azure AI Services come in. The Azure AI Services are AI models, targeting common AI tasks such as sentiment analysis (one of the topics of this post), speech recognition, object detection and translation. These models are trained at Microsoft scale and made available to Azure customers through REST APIs or SDKs for popular languages.
So how does this benefit the non-AI developer? For just pennies in some cases, you can add AI features to your application. And you don’t need to know much, if anything, about AI!
Let’s look at the task of sentiment analysis. The Azure AI Language Service will analyze a body of text, and predict the sentiment of the text as positive, neutral or negative. All you have to do is provide the text, and use the results. Many of the services are literally that easy to use. A lot of the time, the “hard work” of making predictions with AI, is reduced to a single line of code. The rest of the code related to the Azure AI Services is either boilerplate configuration, or processing the results which is what makes your application unique.
Setting Up the Language Service
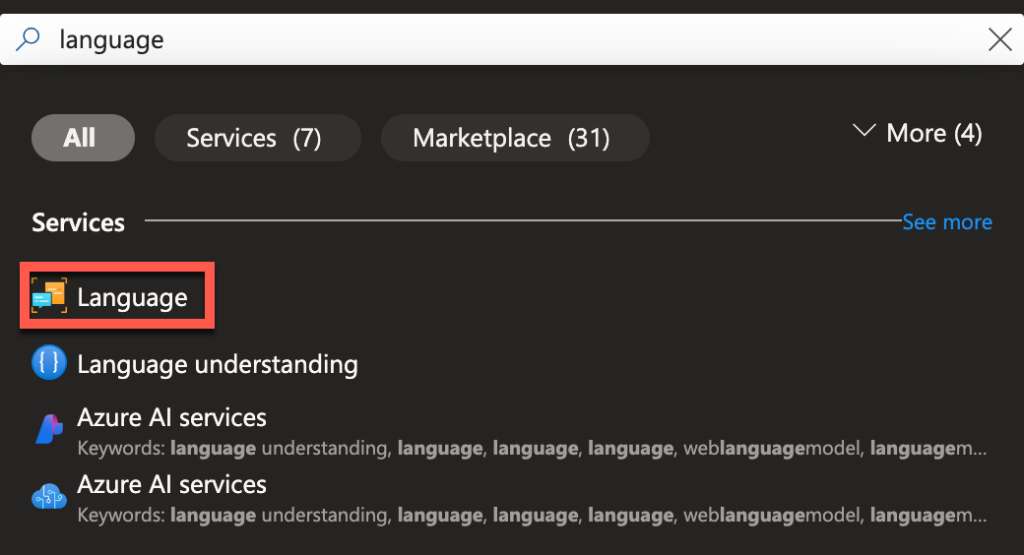
Before doing all of this, you’ll need to provision an instance of the Azure AI Language Service in the Azure portal. At the top of the portal search for language and then select the Language service in the results.
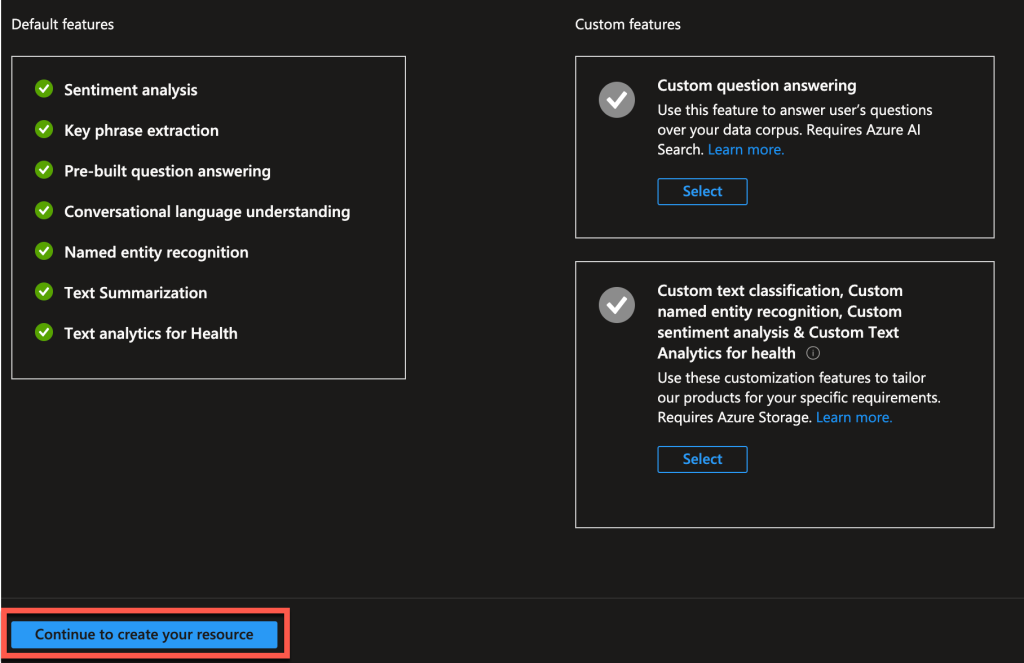
On the next page, click the Create button. Not all features of the Language service are enabled by default as seen on the next page. This post won’t discuss any of the optional features so click the blue button Continue to create your resource.
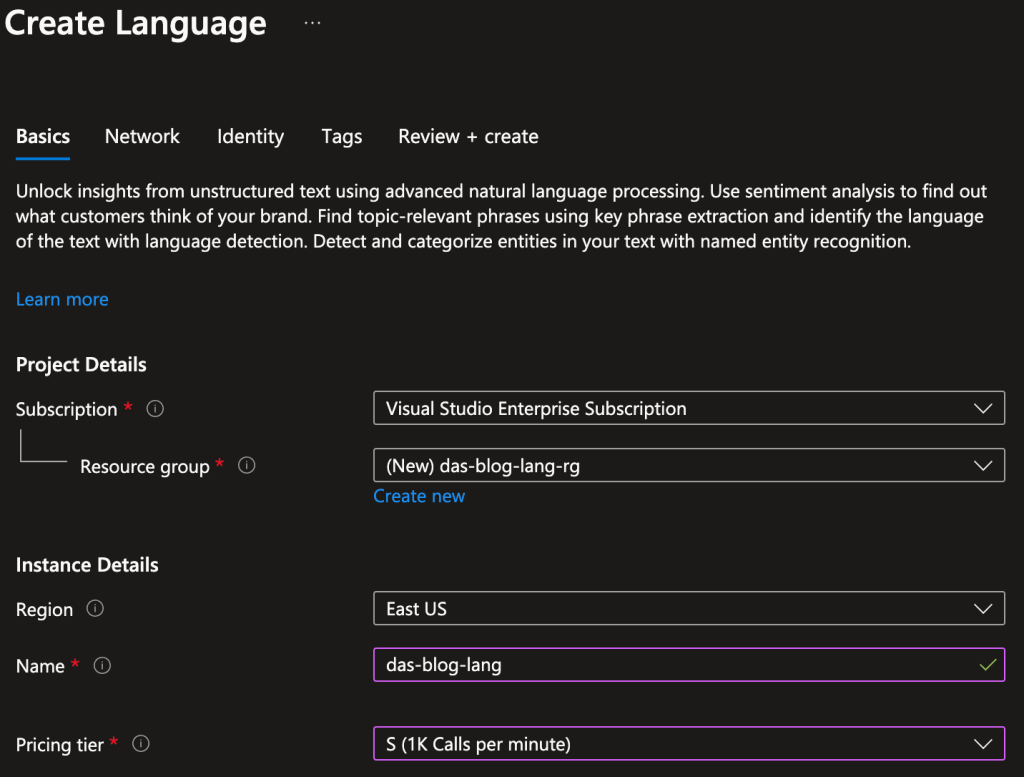
On the next page, you start to configure the Language service. Select a subscription, resource group (or create a new one), and region. Also provide a name for the Language service instance. Then select a pricing tier. Azure offers a free tier for the Language service that gives you a limited number of requests per month. I’ve already used mine in another instance so I have selected the S tier.
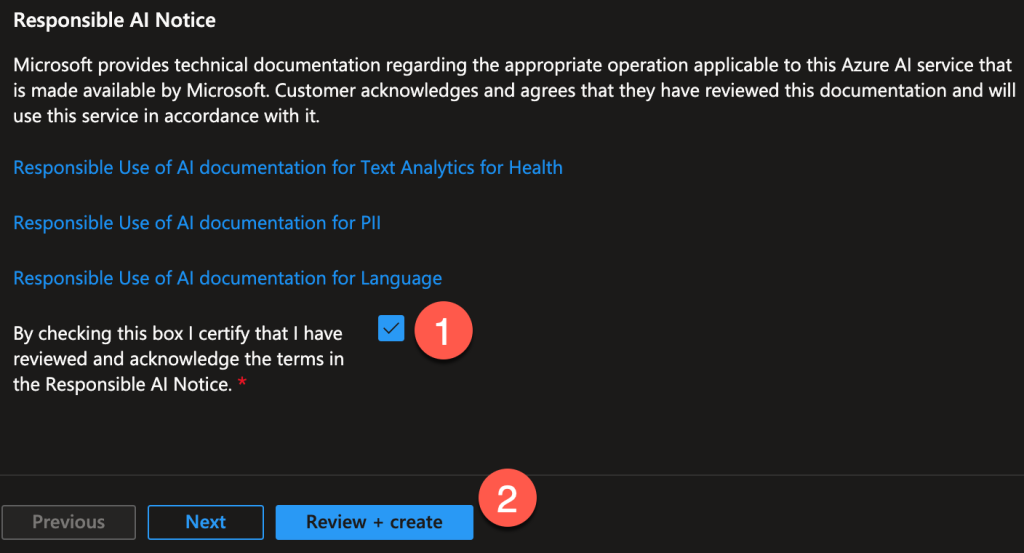
Before continuing, scroll down to the bottom of the page and check the box agreeing to not use the Language service for nefarious purposes. You can explore the other tabs but this post will use the default values. Click the blue Review + create button. On the next page, click the blue Create button to provision the service. This can take a few minutes depending on what kind of mood Azure is in but usually doesn’t take too long.
Once the Language instance is provisioned, click the blue Go to resource button.

There is a lot on this next page, but you’re going to be most interested in the Keys and Endpoint link under Resource Management in the sidebar.

The next page shows two masked keys, the region, and endpoint for the Language instance. The keys are masked because they are like passwords. You provide either of the keys to Azure for authentication. As the cautionary text at the top of the page advises, you should not share them!
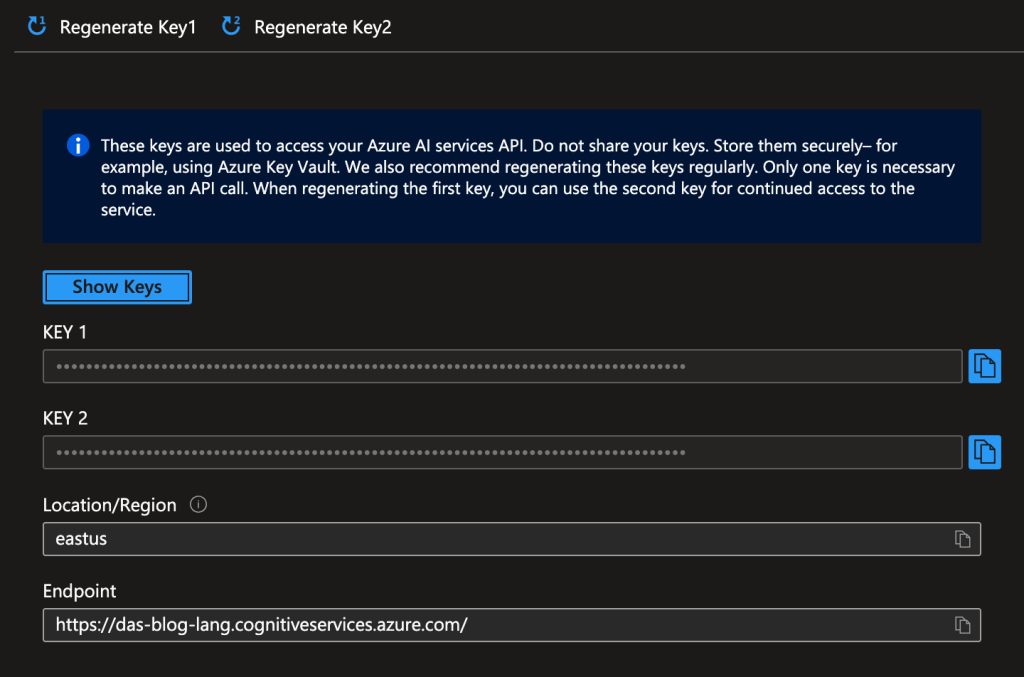
Notice that you can also regenerate the keys. This is useful if one of the keys is compromised or you want to rotate them for security purposes. If you want to regenerate Key 1, you can switch to Key 2 and prevent any downtime.
Take note of one of the keys, and the endpoint and let’s write a simple app!
Performing Sentiment Analysis
For the demo, I’ll be using these paragraphs. There is one for positive, negative and neutral sentiment. (courtesy of ChatGPT)
Positive Sentiment:
The new community center in town has been a fantastic addition, bringing people together in ways we haven't seen before. From family movie nights to engaging workshops and social gatherings, the center provides something for everyone. Local businesses have noticed a positive impact as well, with increased foot traffic and new visitors exploring the area. It’s heartwarming to see neighbors of all ages and backgrounds connecting over shared interests and hobbies. The center has truly become a vibrant hub for our community, and it’s amazing to witness the connections and friendships blossoming there.

Negative Sentiment:
The recent changes to the town’s public transportation system have been disappointing for many residents. With longer wait times and more crowded buses, commuting has become a real hassle. What was once a quick and reliable way to get around has turned into a frustrating ordeal for those who rely on it daily. To make matters worse, the increase in fares has added an extra burden, especially for students and low-income individuals. People feel like they’re paying more but receiving less in return, and the complaints about unreliable service are only growing louder.

Neutral Sentiment:
The new supermarket on Main Street has opened, offering a variety of groceries and household items. It has a spacious layout, with a wide selection of both brand-name and generic products. Its hours are accommodating for early risers and those who prefer to shop later in the evening. While some customers appreciate the convenience of a local shopping option, others feel it may compete with established businesses nearby. Overall, the store appears to be drawing interest from the community, and only time will tell how it fits into the neighborhood.
For the demo, I’ll be using Python. And there is an SDK for Python so it must be installed with pip.
$ pip install azure-ai-textanalyticsRecall that the keys should be stored secured. In a production application you would use environment variables or Azure Key Vault. For the demo, I’ll use the python-dotenv package which also must be installed.
pip install python-dotenvNext create a .env file. The loaddot_env function in the python-dotenv package will read values from this file and create environment variables for them. The format of the file is like that of an environment variable in Linux.
LANGUAGE_ENDPOINT=https://das-blog-lang.cognitiveservices.azure.com/
LANGUAGE_KEY={YOUR_LANGUAGE_KEY}
In a Python file named sentiment.py, import the modules for the Azure AI Language SDK, the python-dotenv package and the os module from the Python Standard Library to load the environment variables.
import os

from azure.ai.textanalytics import TextAnalyticsClient
from azure.core.credentials import AzureKeyCredential
from dotenv import load_dotenv
Call the load_dotenv function and retrieve the environment variables.
load_dotenv()

LANGUAGE_ENDPOINT = os.getenv("LANGUAGE_ENDPOINT")
LANGUAGE_KEY = os.getenv("LANGUAGE_KEY")
Using the key, create an AzureKeyCredential. Use it, along with the endpoint, to create a TextAnalyticsClient. The client will be used to access the Language service.
credential = AzureKeyCredential(LANGUAGE_KEY)
client = TextAnalyticsClient(endpoint=LANGUAGE_ENDPOINT,
    credential=credential)
I won’t include the full text of the paragraphs here. Each body of text is called a document by the Language service.
POSITIVE_DOCUMENT="..."
NEGATIVE_DOCUMENT="..."
NEUTRAL_DOCUMENT="..."

documents = [POSITIVE_DOCUMENT, NEGATIVE_DOCUMENT, NEUTRAL_DOCUMENT]
This concludes the boilerplate configuration for the Language service. And now it’s time for the “hard work” of predicting the sentiment of each document. Again, the SDK reduces this to a single line of code. Call the analyze_sentiment method of the client and pass it the documents.
results = client.analyze_sentiment(documents)There will be a result for each document. Each result will include an overall sentiment for the document which is a string of: “positive”, “negative”, or “neutral”. In addition, there are confidence_scores for each sentiment.
for doc in results:
    print(f"Overall sentiment: {doc.sentiment}")
    print(f"Positive confidence: {doc.confidence_scores.positive}")
    print(f"Negative confidence: {doc.confidence_scores.negative}")
    print(f"Neutral confidence: {doc.confidence_scores.neutral}")
Running the application on my machine gave these predictions. (Your results may be different.)
Overall sentiment: positive
Positive confidence: 0.9
Negative confidence: 0.0
Neutral confidence: 0.1
Overall sentiment: negative
Positive confidence: 0.0
Negative confidence: 0.94
Neutral confidence: 0.06
Overall sentiment: neutral
Positive confidence: 0.08
Negative confidence: 0.02
Neutral confidence: 0.9
The sum of the confidence scores for each document will always be 1.0. For the first document, the overall sentiment was positive. The confidence score for positive sentiment was 0.9 or 90%. The confidence score for neutral sentiment was 10% and 0% for negative.
You can also dig deeper and get the sentiment and confidence scores for individual sentences in the documents. But for now, let’s look at another feature of the Language service.
Key Phrase Extraction
The Azure AI Language Service also support key phrase extraction. Given a body of text, the Language service will list the major topics in the text. Since you already know how to use the Language service, and have an instance provisioned, performing key phrase extraction is reduced to finding the method that does the “hard work” in a single line. That method is extract_key_phrases.
results = client.extract_key_phrases(POSITIVE_DOCUMENT)There will be a result for each document. The key_phrases for each result are the extracted major topics.
for doc_idx, doc in enumerate(results):
    print(f"Document {doc_idx + 1}")
    for phrase_idx, phrase in enumerate(doc.key_phrases):
        print(f"\tPhrase {phrase_idx + 1}: {phrase}")
These are the major topics for the first document (with positive sentiment) that the Language service found are:
Phrase 1: family movie nights
Phrase 2: new community center
Phrase 3: new visitors
Phrase 4: fantastic addition
Phrase 5: social gatherings
Phrase 6: Local businesses
Phrase 7: positive impact
Phrase 8: foot traffic
Phrase 9: vibrant hub
Phrase 10: town
Phrase 11: people
Phrase 12: ways
Phrase 13: workshops
Phrase 14: something
Phrase 15: everyone
Phrase 16: area
Phrase 17: neighbors
Phrase 18: ages
Phrase 19: backgrounds
Phrase 20: interests
Phrase 21: hobbies
Phrase 22: connections
Phrase 23: friendships
There are other features available in the Language service. You can even train custom classification models on your own data! Remember that you can get a free tier of the Azure AI Language Service and other AI services too. Go to https://azure.microsoft.com/en-us/pricing/purchase-options/azure-account/ to review the available options.
